Contents
To assign a new product to an object, the Edit data button must be pressed (see Figure 1).
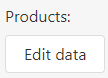
Figure 1 - Edit data
Subsequently, a new window opens in which existing products can be assigned to the respective object or new products can be created.
The following example illustrates the creation and subsequent addition of a new product to the Customer object.
Figure 2 shows the still empty product list of the Customer object. The column headings show the product-specific settings. These can be parameterized as soon as a product has been selected.
Button |
Description |
|
Via the search bar existing entries can be searched |
|
A click on the Excel button opens a drop down that can be used to either export product entries to an Excel spreadsheet or import them from Excel. A template for importing data can also be created. See here for details.
|
|
A click on the Copy button opens a drop down, where products of successors and predecessors can be copied to the current object. If a product already exists it will not be overwritten.
|
|
A click on the + button adds a new entry to the list |
|
A click on the Delete button deletes the currently selected products |
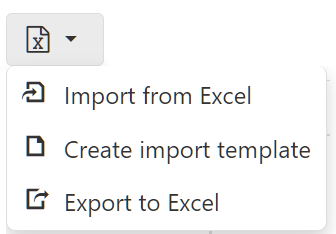
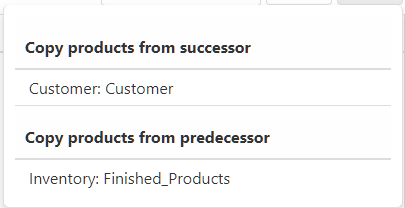
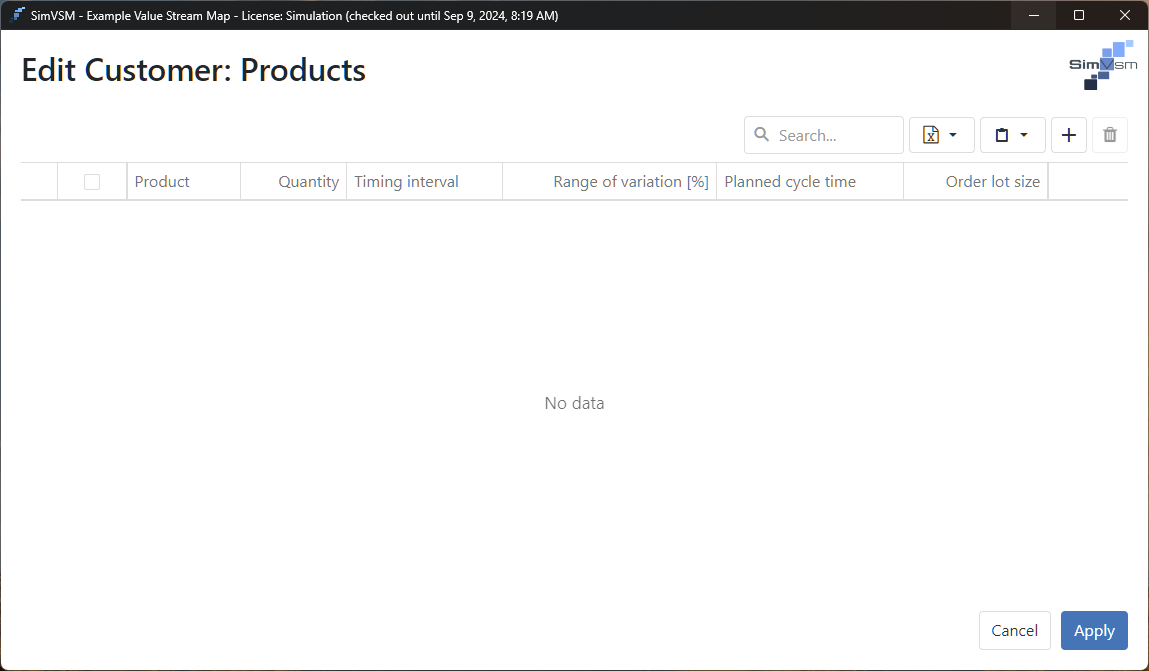
Figure 2 - Edit products
A click on the + button |
|
adds a new entry to the list. Now either an existing product must be selected in the column Product, or a new product must be created. |
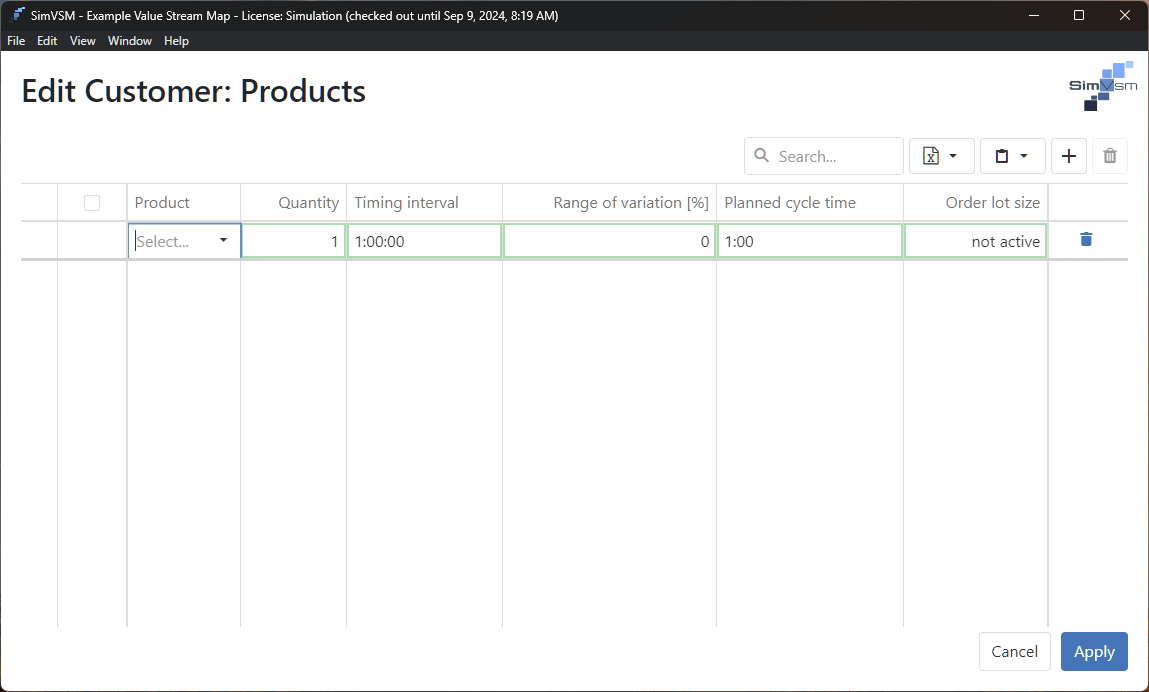
Figure 3 - Select/Create Product
If no product has been created yet, this can be done via the drop down entry Create new product.
Alternatively, new products can also be created via the Product Names tab in the local project settings.
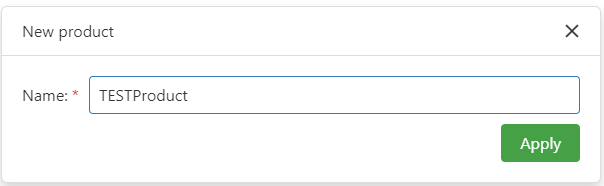
Figure 4 - Create New Product
Import templates can be created for every object that contains products. An Excel file is automatically generated and saved with the respective name of the object.
The template contains all the columns that are available in the object. Figures 5 and 6 show this using the Supplier object as an example.
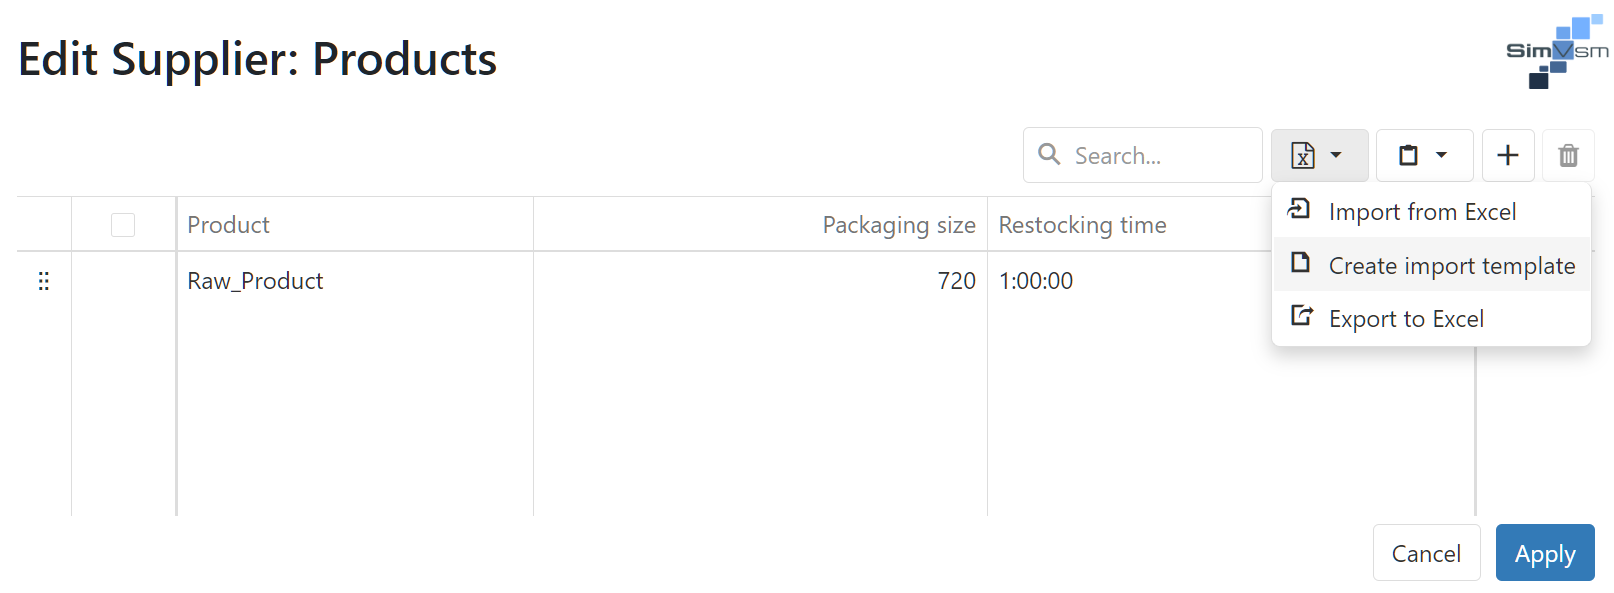
Figure 5 - Create import template
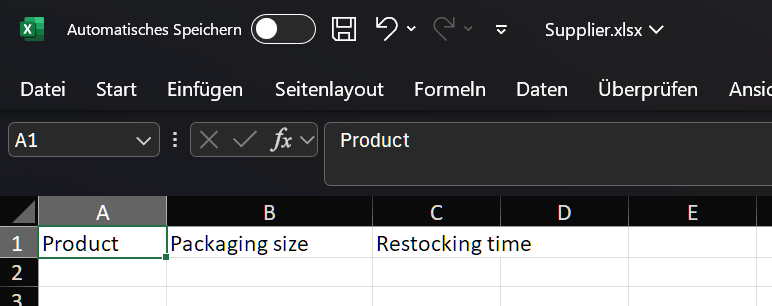
Figure 6 - Creating an import template
The import template can be filled in Excel after export and then imported back into SimVSM.
When importing, you can also specify the Excel spreadsheet from which the data is to be imported (see Figure 7).
When importing, it must be ensured that the corresponding products (names) have already been created in SimVSM, otherwise a corresponding message will be displayed (see Figure 8).
If data already exists, the user can decide whether it should be overwritten or retained (see Figure 9).
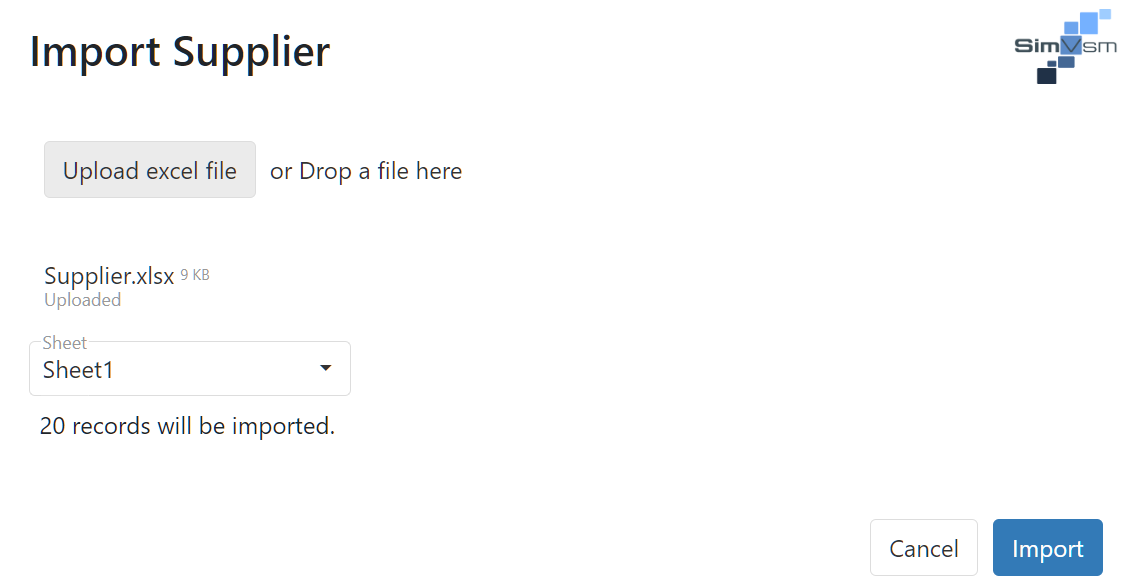
Figure 7 - Import Excel data
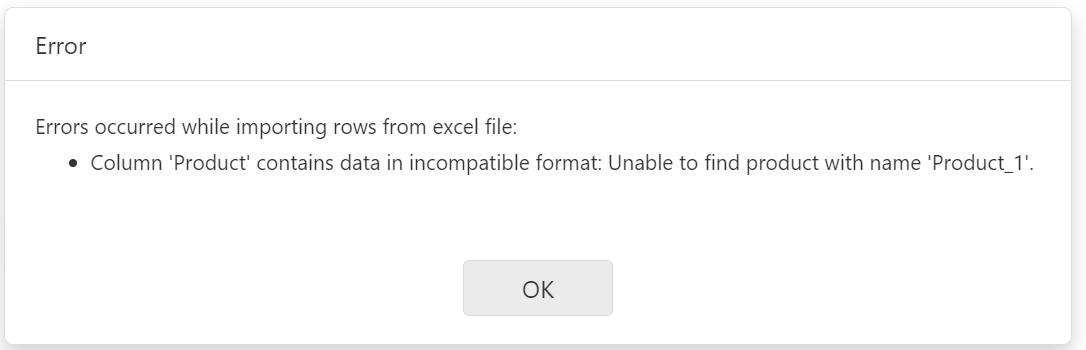
Figure 8 - Product name error message
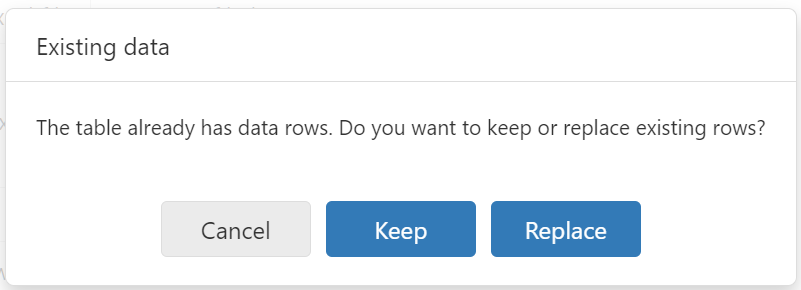
Figure 9 - Existing data message
© SimPlan AG - Hanau District Court, Commercial Register (Part B) 6845 - info@simplan.de - www.simplan.de/en